How to convert APE to FLAC?
Introduction.
APE is a filename extension for a popular lossless audio format, Monkey's Audio. Lossless means that no audio data is discarded when you convert music into this format. This is different from MP3, AAC, and other lossy formats.
FLAC is another popular lossless audio format (FLAC stands for free lossless audio codec). If you convert music from APE to FLAC or the other way around, the resulting files will be identical in the sense of audio quality.
Although APE files are smaller, if compared to FLAC, you may want to convert APE to FLAC for a number of reasons. First of all, the APE format uses a symmetric compression algorithm, which means that a player will need significant processing power in order to decode (play) APE files. Furthermore, FLAC files are generally better supported on various platforms and by various devices.
You can easily convert APE to FLAC using AudioConverter Studio.
Step 1: Download and install the program.
Download AudioConverter Studio to your computer and start the file. Follow instructions of the setup wizard to install the audio converter.
Step 2: Start the program. Select APE files.
Start AudioConverter Studio. The wizard window is shown:
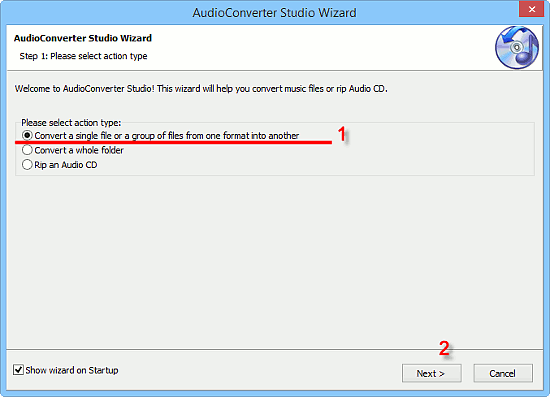
If you do not see the window, press Ctrl + W on your keyboard, or select "File" - "Show wizard".
In the first step of the wizard, select the "Convert a single file or a group of files..." option (1) and click "Next".
A usual "Open file" dialog pops up.
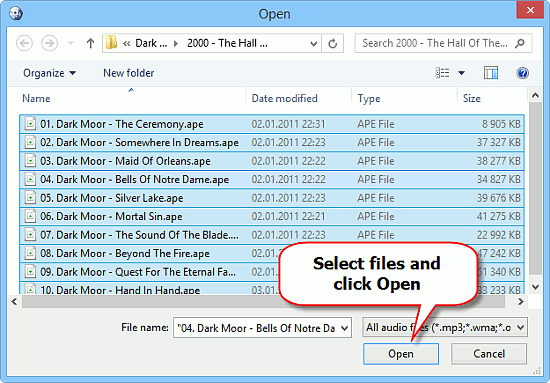
Browse to the folder where your APE files are stored, select the files (either with the mouse or by pressing Ctrl + A to select all) and click "Open".
The selected files will be added to the list:
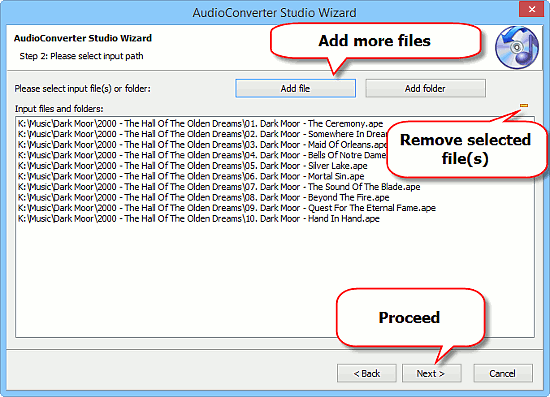
You can add further files and folders using the buttons in the upper part of the window. It is also possible to remove some files from the list by selecting them and clicking the yellow minus button in the upper right corner.
But in most cases you just need to click "Next".
Step 3: Select output folder.
In the next step, you can select a folder for your future FLAC files.
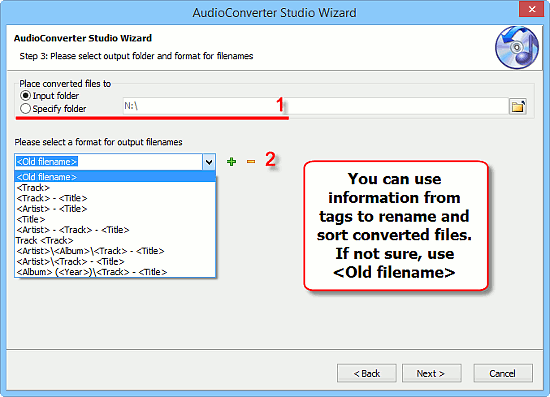
There is an option to use the same folder where your source files (APE) are stored. Alternatively, you can select any folder on your computer (1). You need to have sufficient privileges to create files in the selected folder, otherwise the program will not be able to save converted files.
The other option in this step allows renaming and sorting the converted files according to information in tag fields of your source files (2). If tags of your APE files are empty, or you are not sure what to select here, just use the <Old filename> option.
Click "Next" to proceed.
Step 4: Set FLAC as output format.
In the next step, select "FLAC" from the "Output format" dropdown list:
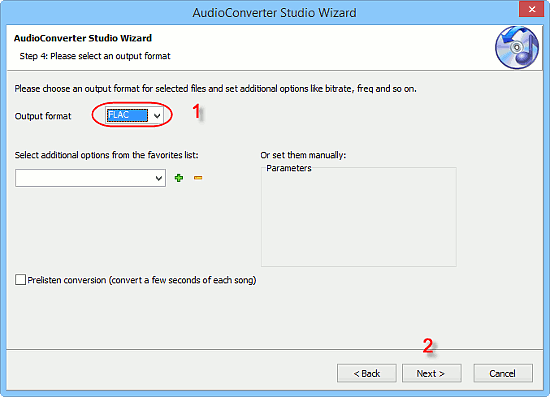
You do not need to change anything else here. If you enable the "Prelisten conversion" box, only a few seconds of each song will be converted.
Click "Next" to continue.
Step 5: Convert APE to FLAC.
In the last step of the wizard, a summary is shown:
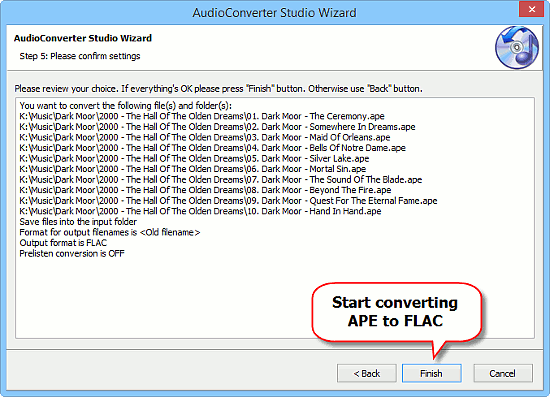
It lists all source files, the destination format, the selected output folder and filename pattern. If everything is correct, click "Finish" to start converting APE to FLAC.
AudioConverter Studio will show a progress window. Depending on the number of files, it may take some time. Finally, the program will show a message like this:
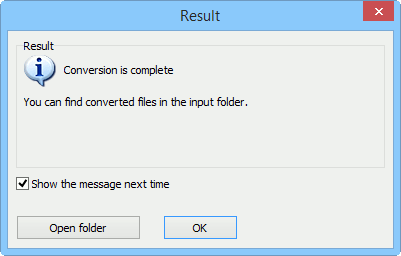
Click the "Open folder" button to access the converted FLAC files via Windows Explorer.
The free trial version of AudioConverter Studio can convert up to 10 files at once. You can repeat the process as many time as you wish. If you like the program, you can register it and remove all limitations.
Search
Related
- How to convert WMA to WAV?
- How to convert FLAC to WAV?
- How to convert APE to FLAC?
- How to rip Audio CD to APE?
- How to rip Audio CD to FLAC?
- How to convert MP3 to WAV?
- How to convert WMA to MP3?
- How do I convert MPC to MP3?
- How to change bitrate of MP3 files?
- How to convert WAV to MP3?
- How to convert CDA to MP3?
- How to convert OGG to MP3?
- How do I convert APE to MP3?
- How do I convert FLAC to MP3?
- How to convert a whole folder of audio files into the OGG format?
- AudioConverter Studio 6.0 review
- AudioConverter Studio review
Ask our expert
- How to share screen videos online?
- How to sort duplicate music files by ID3 tags?
- How to get quick updates on movies by director?
- How to convert multiple MIDI files into an MP3?
- How to rotate videos?
- How to convert WMA to WAV?
- How to play MIDIs on an iPhone?
- How to split an audio file into equal parts?
- How to split m4b audiobooks into chapters for free?
- How to convert videos for You Tube?


