How do I combine AVI episodes into a full-length professional looking movie?
Introduction.
Yeah, that's one of my favorites, thank you.
A professional looking movie requires much experience with a camera, and that's probably the most important part of it. On the other hand, even a good video by itself isn't a movie yet. You need to do some video editing: cut unnecessary parts out (otherwise the whole thing can easily become boring; the professional movie makers cut pretty much out, some episodes are later included as specials on the DVD, but they don't appear in the actual movie; there is also a difference between theatrical and DVD (extended) editions), add transitions between episodes to make the movie smooth, add titles or subtitles where needed, emphasize some moments by zooming in while showing the whole picture in a smaller box (picture in picture), and so on.
Well, suppose you have a bunch of episodes that you want to combine. What now? How to add those transitions, subtitles, effects? Does it require experience as well?
Not at all, if you have a program like AVS Video Editor. It is called 'video editor', but I would call it a home video studio: it's a complete solution for capturing, editing, mixing, creating DVD-menus, burning.
Step 1: Download and install the program.
Download AVS Video Editor to a known location. Run the downloaded package and follow on-screen instructions to install it.
Step 2: Start the program. Create a new project.
Launch AVS Video Editor.
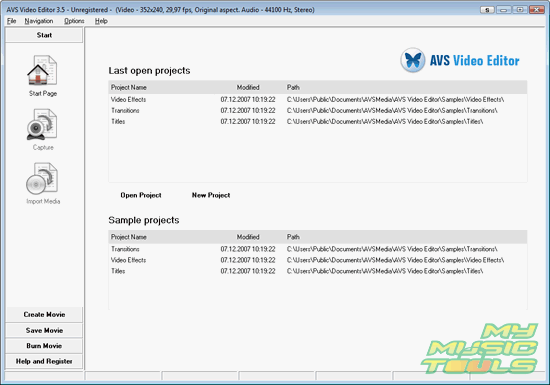
Click menu "File", then select "Create new project" (alternatively, you can press "Ctrl" + "N", as usual).
This will invoke a simple two-steps wizard. First, select a name and a folder for your project:
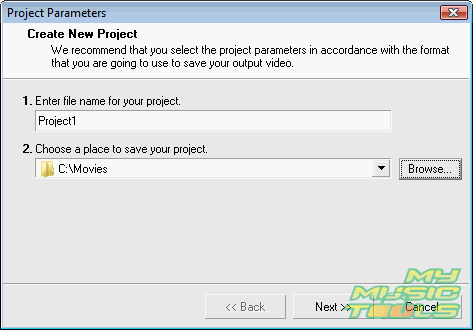
Click "Next".
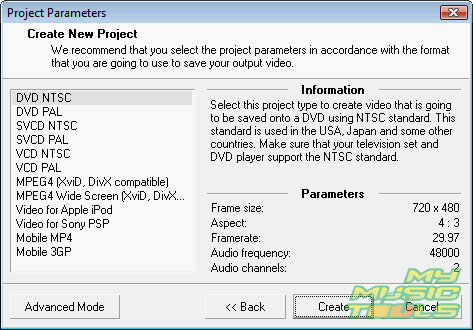
Here select a type for your project. If you intend to burn a DVD, just select DVD NTSC (if you are in USA or Canada), or DVD PAL (if you are in Europe).
Finally, click "Create".
Step 3: Combine your videos. Add transitions.
Now let's add our videos to the empty project.
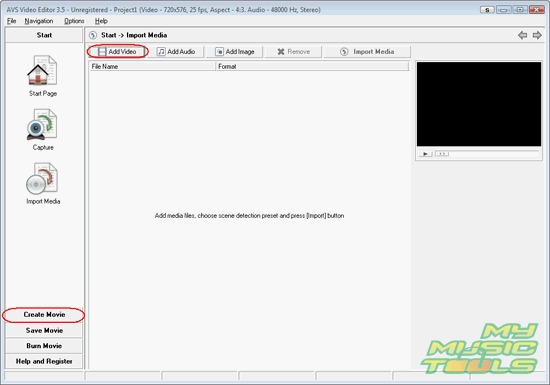
Click "Add Video" button (highlighted on the screen shot above) and select all the episodes that you want to combine. If all episodes are in one file, you can open that file and run the scene detection tool.
When ready, switch to "Create Movie" (see on the left).
Now, the process of combining videos is pretty straightforward. You just add episodes one by one by dragging and dropping them in the empty boxes:
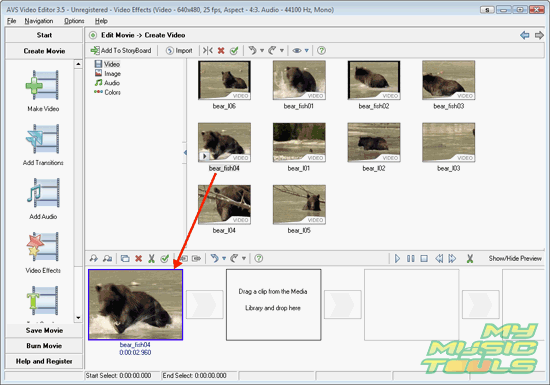
After placing the fragments in the preferred order, click "Add Transitions" item on the left pane (the second from the top). Preview transitions by placing mouse cursor over them:
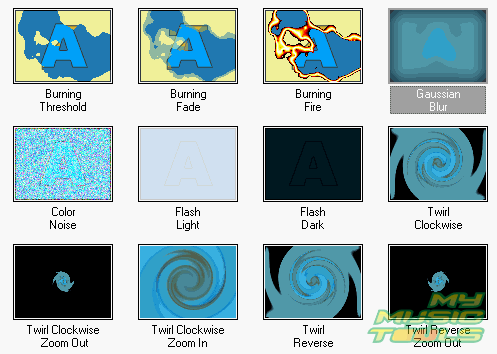
Then use the same method as above (drag&drop) to insert the appropriate transition between two episodes:

You can preview your movie any time, but remember that applying effects in real time may be not smooth, that is unless you have a supercomputer. The real movie will look better.
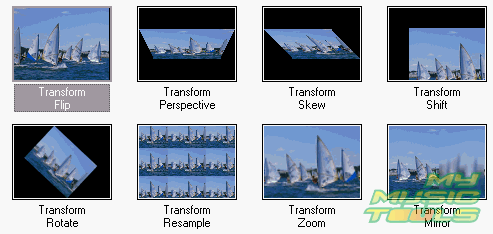
In the similar way you can add subtitles, moving text, audio tracks, images, 'picture in picture' video, different video effects:
Step 4: Create DVD-menu. Burn DVD.
At last, you will need to save or burn your movie. If you've decided to make a DVD, you may want to create a DVD-menu. Click "Burn Movie" on the left pane, then select the topmost item "DVD menu":
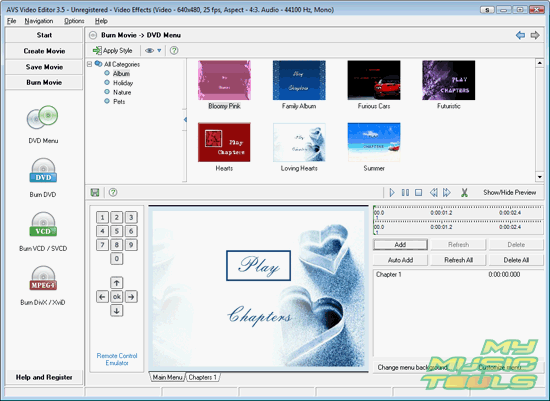
Choose a style, or create your own menu. Add titles, chapters etc. Finally, click "Burn DVD" and follow instructions of the wizard to burn your movie.
The trial version of the program adds a logo to all compiled projects. Otherwise there are no limitations. After purchasing you will be able to unlock the program and it will stop adding the logo.
Search
Related
- How to share screen videos online?
- How to rotate videos?
- How to capture video?
- How do I convert AVI to Zune?
- Movavi VideoSuite 4.4 review
- How to record a screen video?
- How to make a video tutorial?
 How to add a watermark to your video?
- How to fix a blurred video?
- How to increase brightness of a dark video?
- How do I combine AVI episodes into a full-length professional looking movie?
- How do I stay anonymous in a webcam chat?
- How do I improve quality of videos and old movies?
- AVS Video Editor 3.4 review
- MOVAVI Releases EnhanceMovie 2.0
- MOVAVI Releases EnhanceMovie 1.3
- How to play MKV file?
- How to play any video?
Ask our expert
- How to share screen videos online?
- How to sort duplicate music files by ID3 tags?
- How to get quick updates on movies by director?
- How to convert multiple MIDI files into an MP3?
- How to rotate videos?
- How to convert WMA to WAV?
- How to play MIDIs on an iPhone?
- How to split an audio file into equal parts?
- How to split m4b audiobooks into chapters for free?
- How to convert videos for You Tube?


